
はじめに
情報が出てから少々時間がたったかもしれない A2A に、遅ればせながら入門してみます。
●Agent2Agent プロトコル(A2A)を発表:エージェントの相互運用性の新時代 | Google Cloud 公式ブログ
https://cloud.google.com/blog/ja/products/ai-machine-learning/a2a-a-new-era-of-agent-interoperability
今回の内容
A2A に入門するのに、どんなコンテンツに手をつけようかと調べてみていたら、下記の公式チュートリアルを見かけたので、これを試すことにしました。
●Introduction – Agent2Agent Protocol (A2A)
https://google.github.io/A2A/tutorials/python/1-introduction/
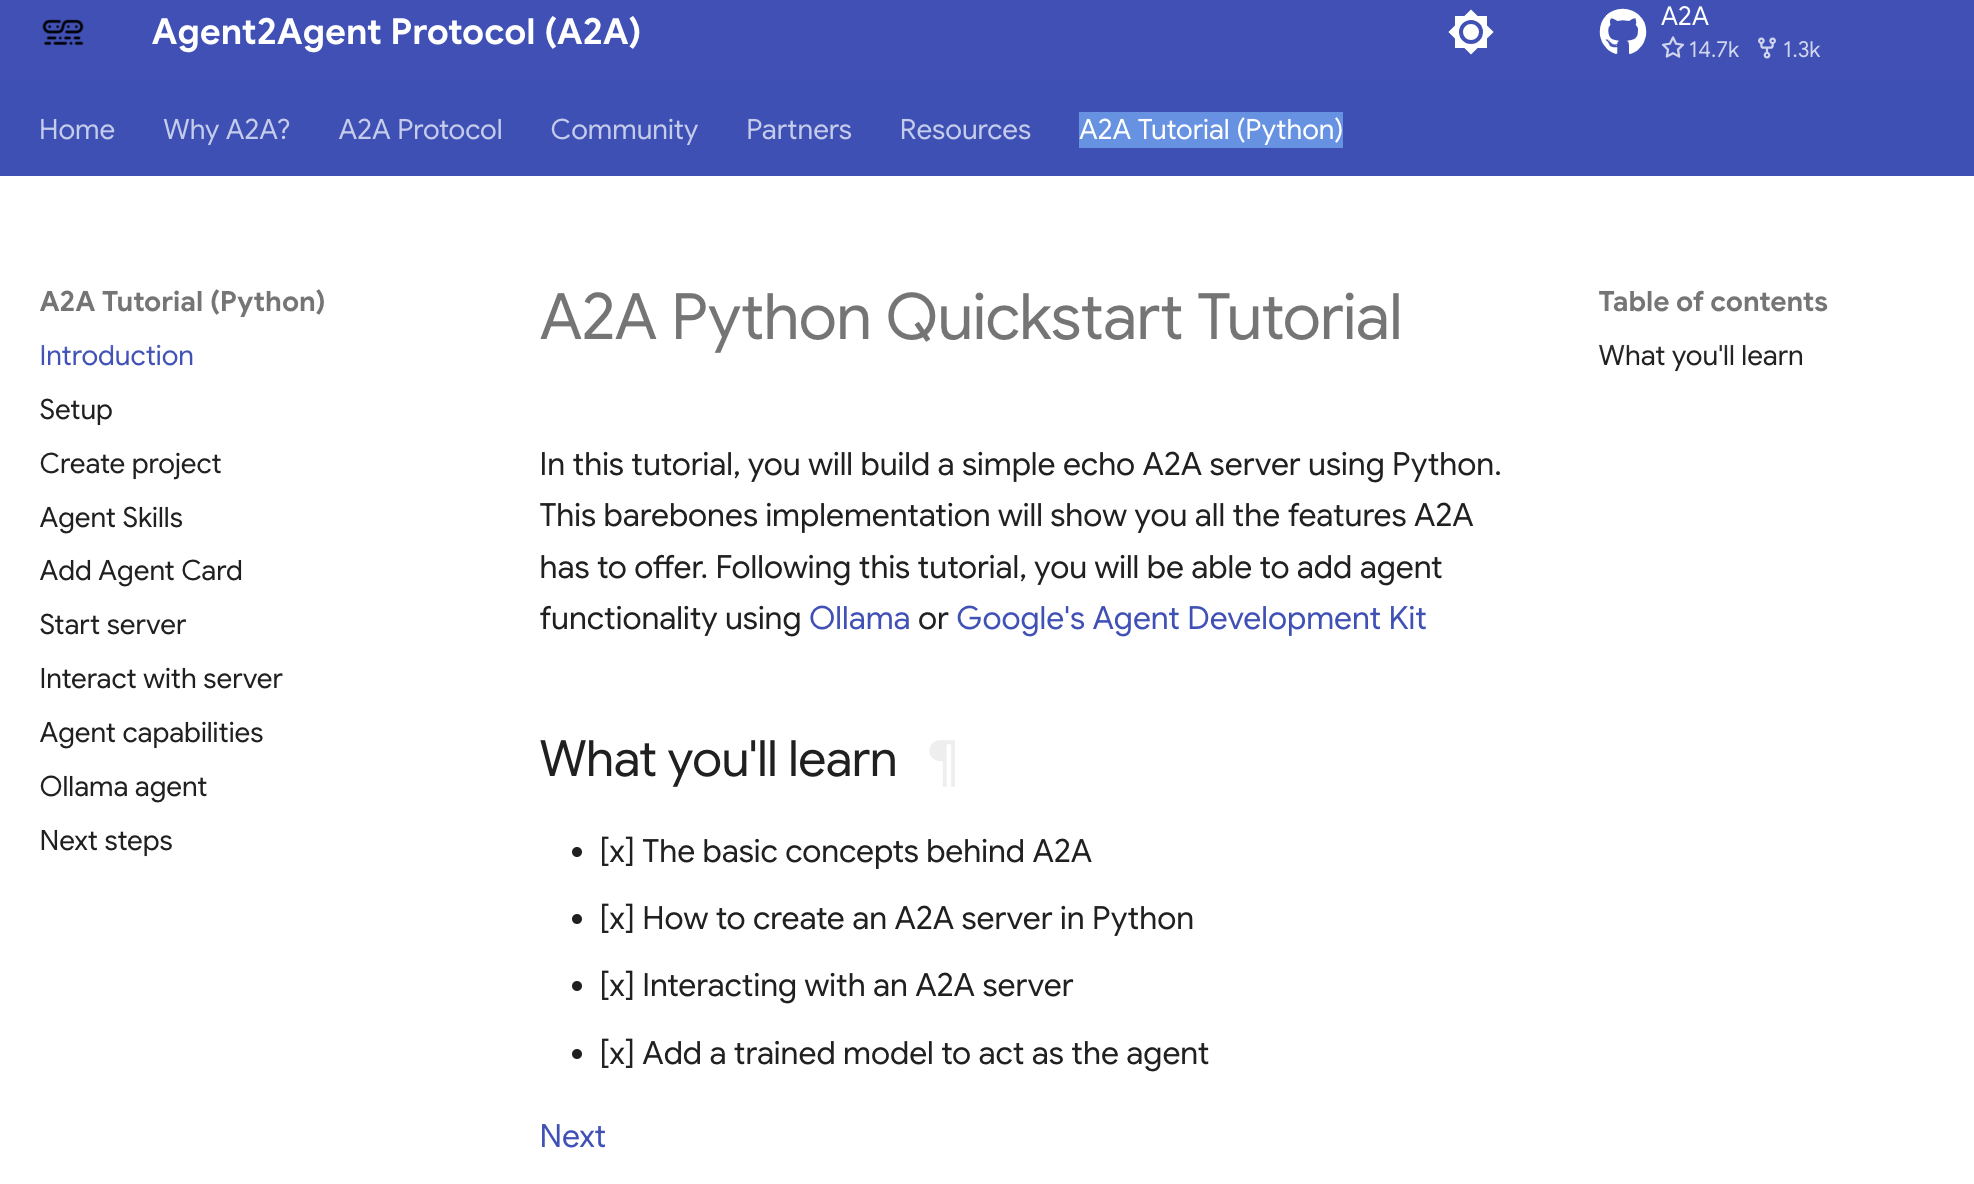
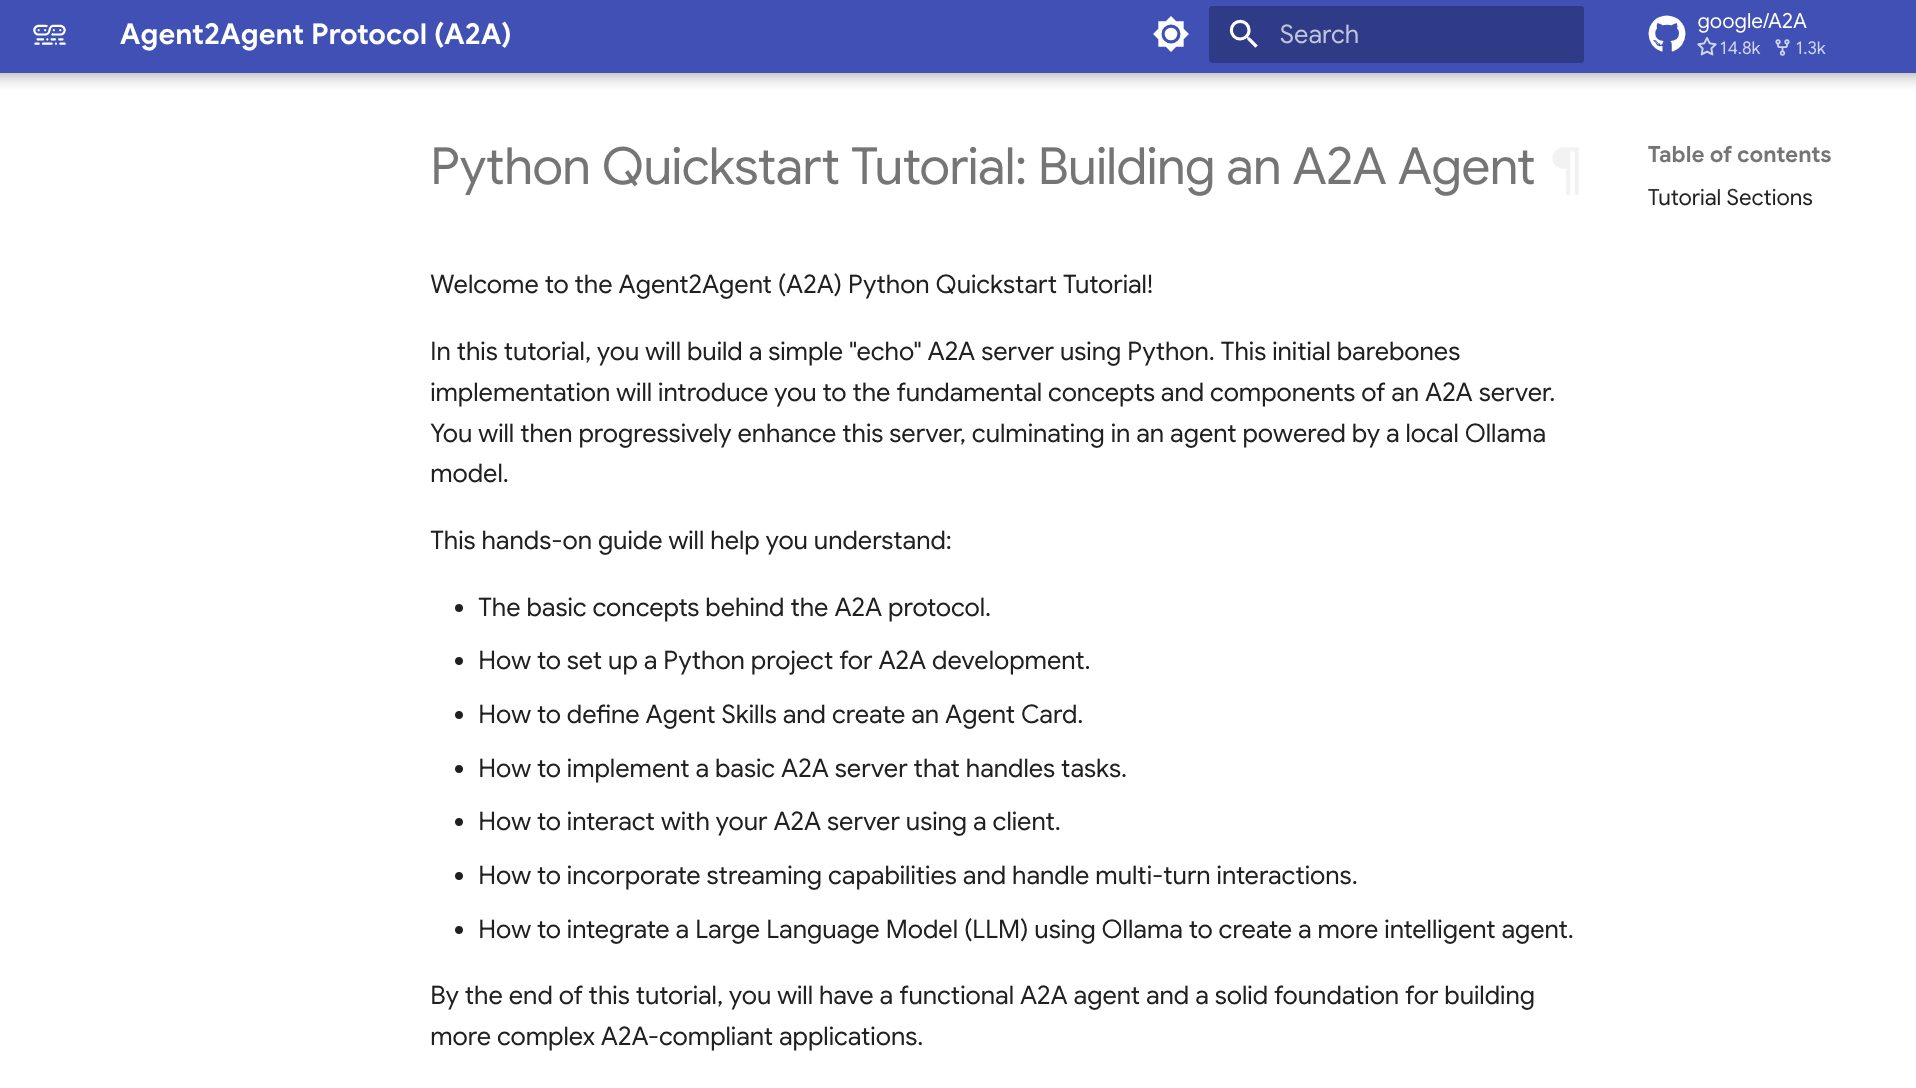
ページの内容が少し変わった?
記事を途中まで書いて、再度、上記にアクセスしたところ、チュートリアルの画面が変わっていたので、更新後のページも掲載しておきます。
チュートリアルを進めていく
それでは早速、チュートリアルを進めていきます。
必要な環境
「Set up Your Environment」というページを見ると、試すのに必要な環境の情報が掲載されています。
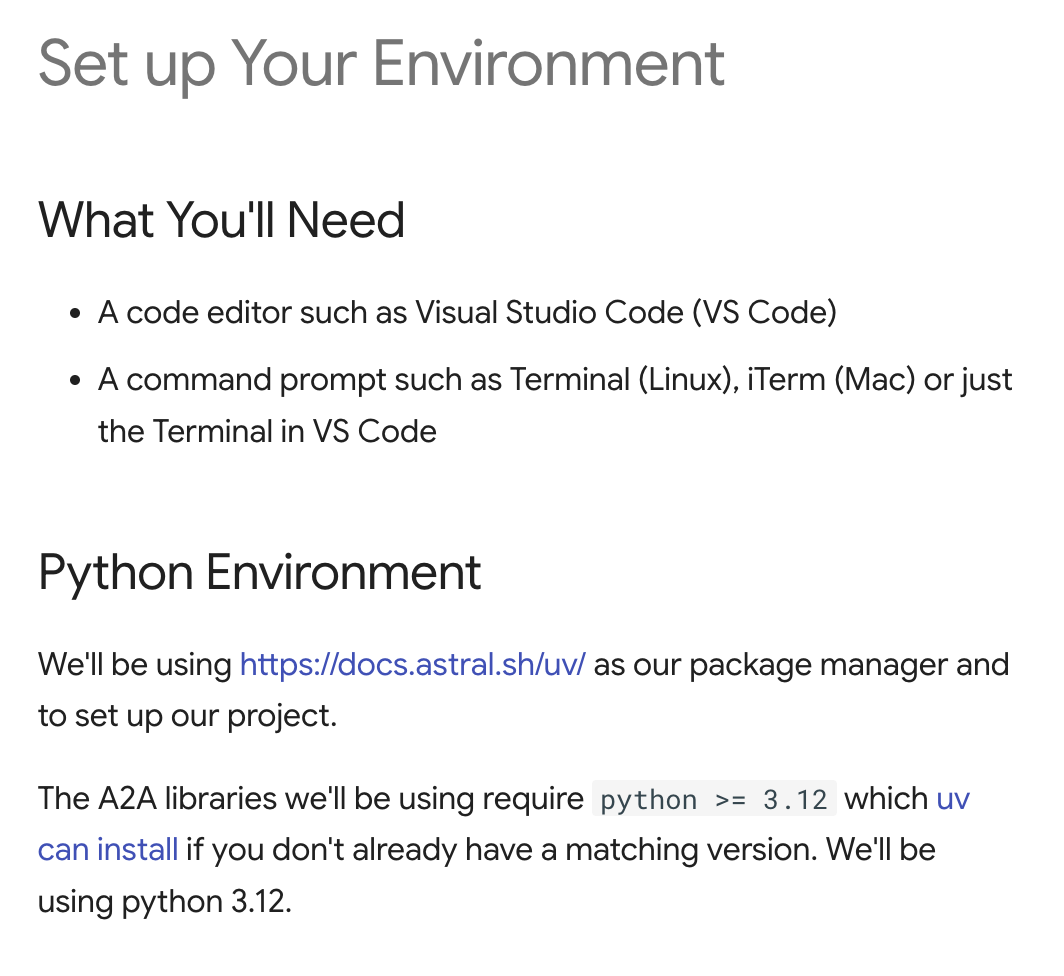
自分の場合、以下の組み合わせでそろっている状態でした。
- VS Code
- iTerm (Mac) or just the Terminal in VS Code
- Python(>= 3.12)
- uv
また上記のページには、環境を確認するためのコマンドとして、以下が掲載されていました。
echo 'import sys; print(sys.version)' | uv run -
下準備
uvコマンドを使って、下準備を進めます。公式ページに書かれた以下のコマンドを実行していきます。
uv init --package my-project
cd my-project
uv venv .venv
source .venv/bin/activate
上記の最後のコマンドで、仮想環境がアクティベートされた状態になりました。その中で、さらにパッケージのインストール・ファイルの作成も行います(ここで作成した 2つのファイルは、少し後の手順で実装を行うようです)。
uv add git+https://github.com/google/A2A#subdirectory=samples/python

touch src/my_project/agent.py
touch src/my_project/task_manager.py
また、以下の確認も行っておきます。
以下のとおり、上記と同じ結果を得られることを確認できました。

現時点までの内容は問題なさそうです。
Agent Skills
チュートリアルのページ左にあるメニューで示すと、次は以下の Agent Skills の部分です。

ここでは、現時点では以下の内容で用意されている src/my-project/__init__.py の内容を編集するようです。
def main() -> None:
    print("Hello from my-project!")
書きかえた後の内容は、以下のとおりです。
import google_a2a
from google_a2a.common.types import AgentSkill

def main():
  skill = AgentSkill(
    id="my-project-echo-skill",
    name="Echo Tool",
    description="Echos the input given",
    tags=["echo", "repeater"],
    examples=["I will see this echoed back to me"],
    inputModes=["text"],
    outputModes=["text"],
  )
  print(skill)

if __name__ == "__main__":
  main()
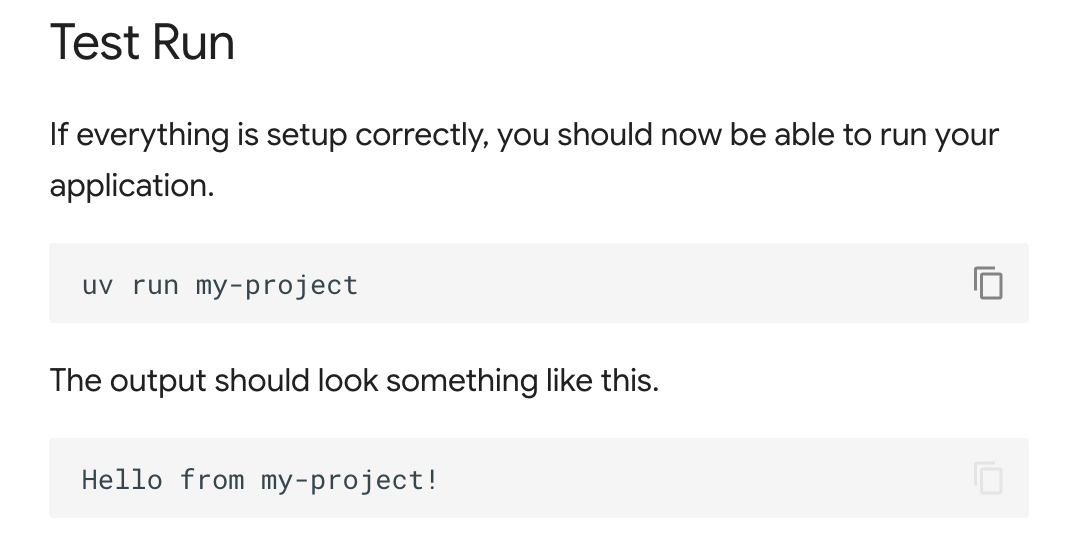
そして以下のコマンドで、上で実装したスキルの内容が表示されることを確認します。
しかし想定通りの結果は得られず、以下のエラーメッセージが出ました。
(.venv) % uv run my-project

Traceback (most recent call last):
  File "/【プロジェクトを置いたルートのパス】/my-project/.venv/bin/my-project", line 4, in
    from my_project import main
  File "/【プロジェクトを置いたルートのパス】/my-project/src/my_project/__init__.py", line 1, in
    import google_a2a
ModuleNotFoundError: No module named 'google_a2a'
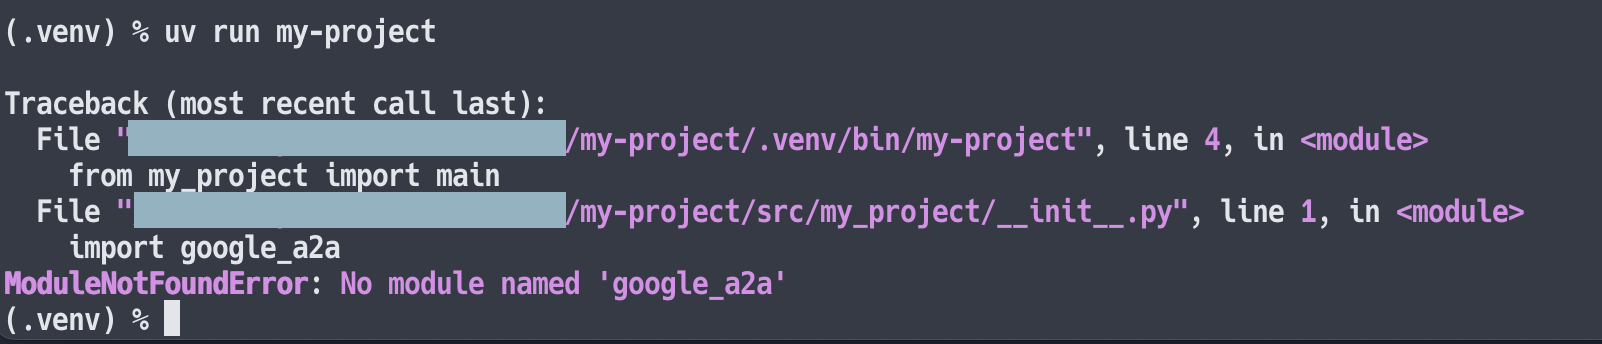
「google_a2a」が見つからない、という内容ですが、調べてみた感じだとパッケージの名称ではなさそうでした。
Agent Skills のエラーの対処
「google_a2a」はパッケージではなさそうで、当初 Web検索で情報を見つけられませんでした。それで「google_a2a」をキーワードに GitHub上を検索したところ、以下の Issue を見つけることができました。
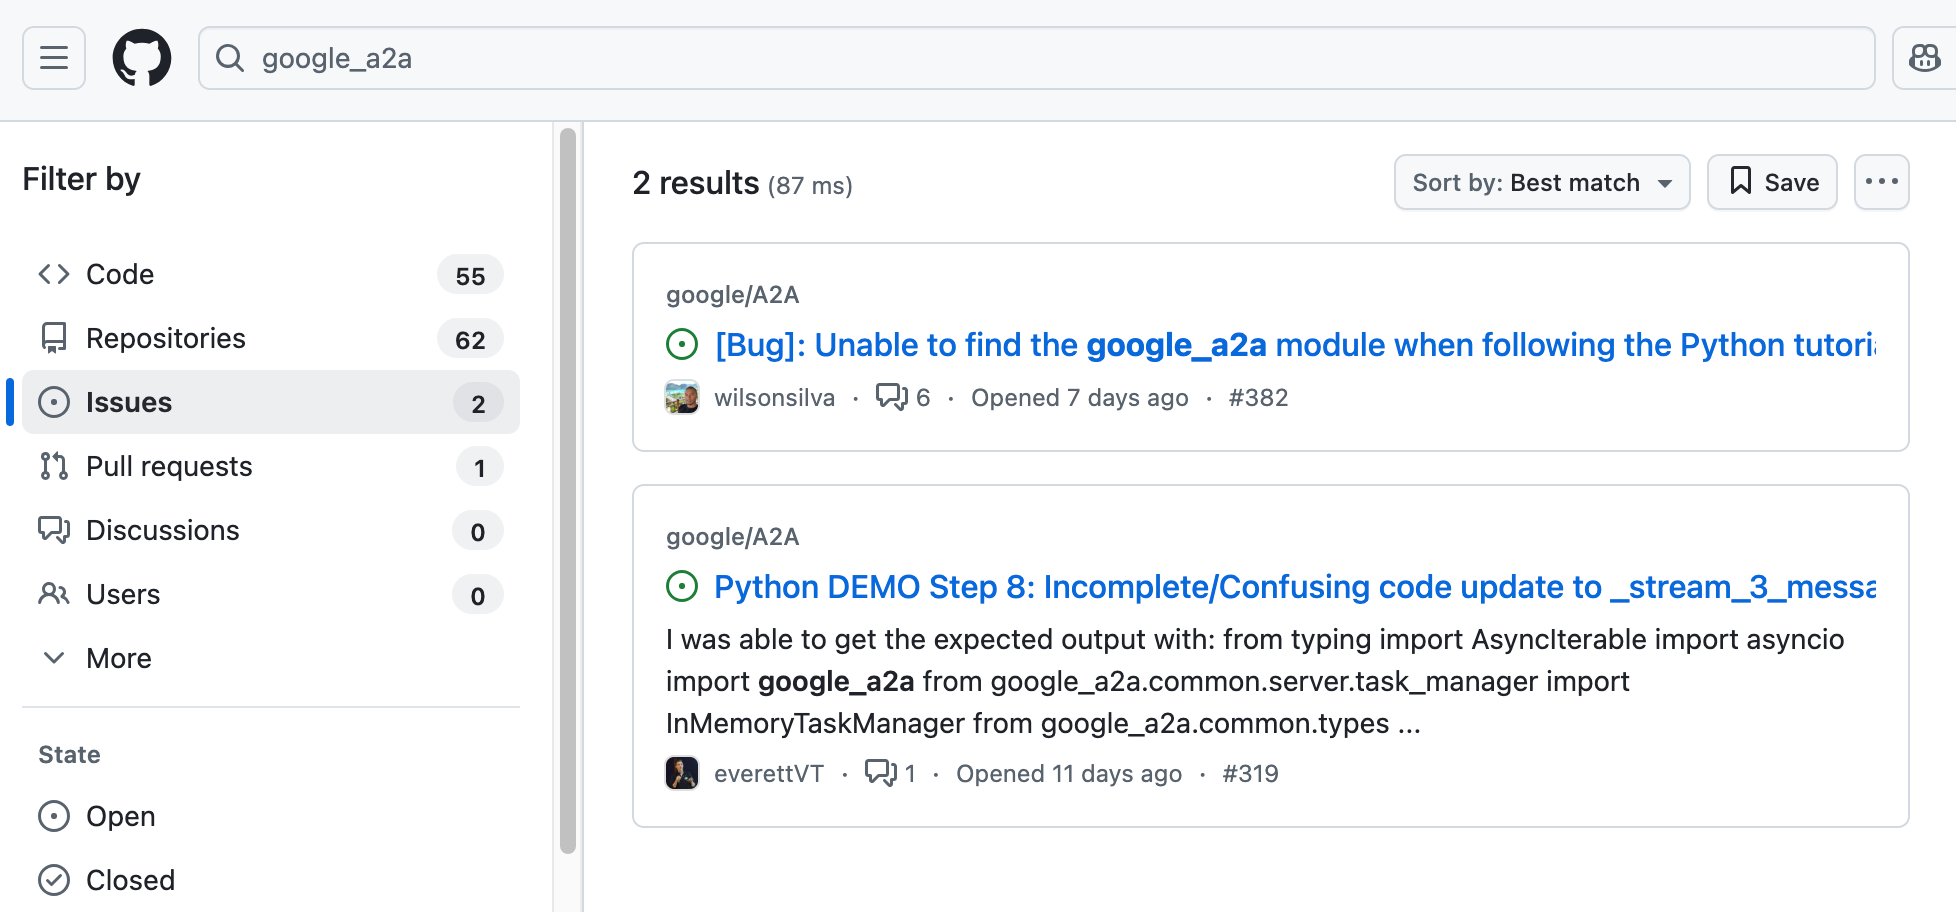
それらを見てみると、以下に関係する内容が書かれていそうでした。
●[Bug]: Unable to find the google_a2a module when following the Python tutorial · Issue #382 · google/A2A
https://github.com/google/A2A/issues/382
この Issue内に書かれたリンクをたどって情報を見ていくと、以下を見つけられました。
●3. Creating a project
https://djsamseng.github.io/A2A/#/tutorials/python/3_create_a_project
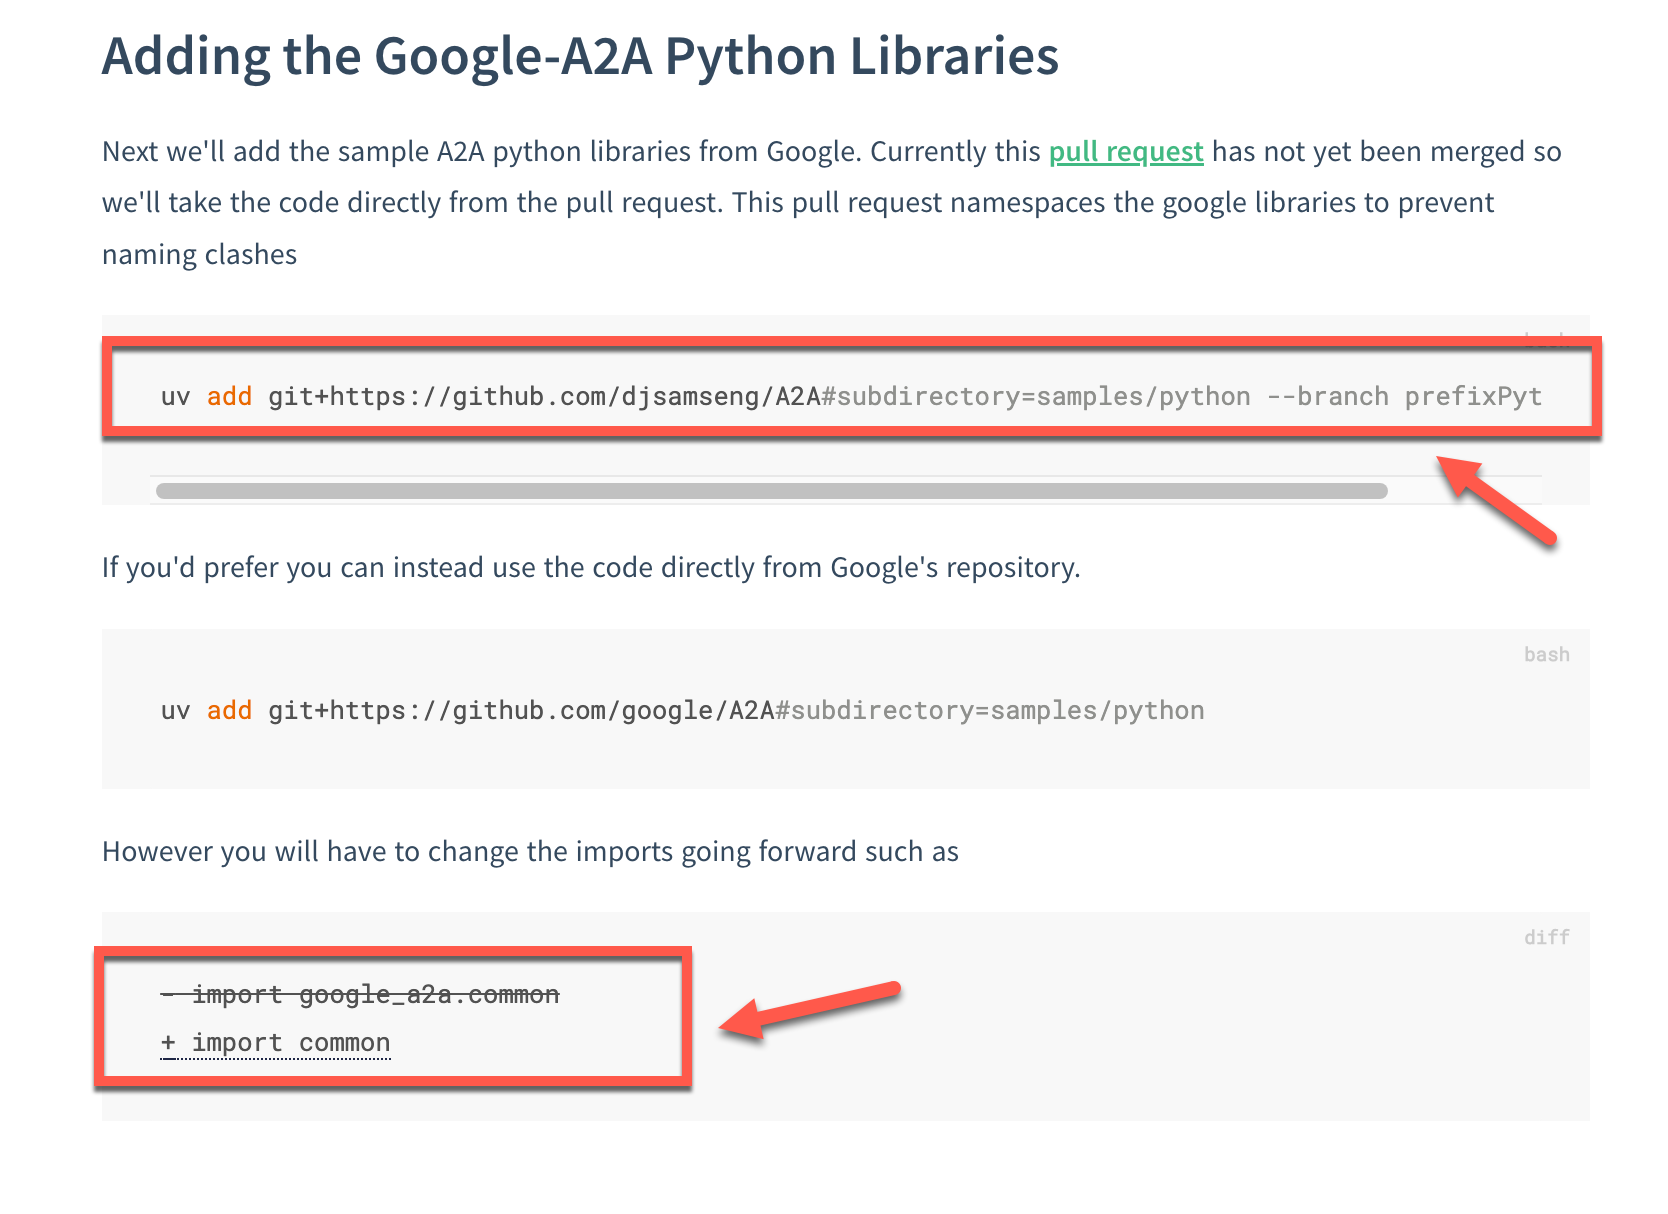
ここでは 2つの方法が書いてあり、自分はコードの書きかえで対処できる 2つ目のほうを試しました。具体的には src/my-project/__init__.py のコードを以下のようにします(エラーが出る部分と、そこを修正した後の両方を掲載しています)。
# import google_a2a
# from google_a2a.common.types import AgentSkill
import common
from common.types import AgentSkill

def main():
  skill = AgentSkill(
    id="my-project-echo-skill",
    name="Echo Tool",
    description="Echos the input given",
    tags=["echo", "repeater"],
    examples=["I will see this echoed back to me"],
    inputModes=["text"],
    outputModes=["text"],
  )
  print(skill)

if __name__ == "__main__":
  main()
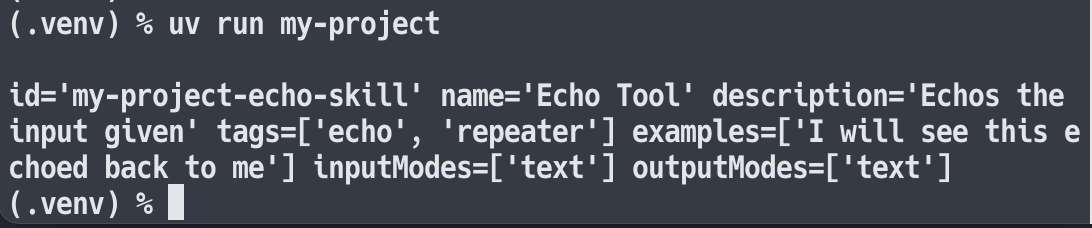
上記の修正を行った後に、再度 uv run my-project を実行したところ、以下の想定通りの出力を得られました。
エージェントカードの追加
次に、以下の Add Agent Card の手順へと進みます。
●Add Agent Card – Agent2Agent Protocol (A2A)
https://google.github.io/A2A/tutorials/python/5-add-agent-card/#test-run
ここで手順に書いてある以下を実行します。
click · PyPI のページを見てみると、コマンドラインインタフェースの作成を補助してくれるライブラリのようです。
その後、 src/my-project/__init__.py を以下のように書きかえました。
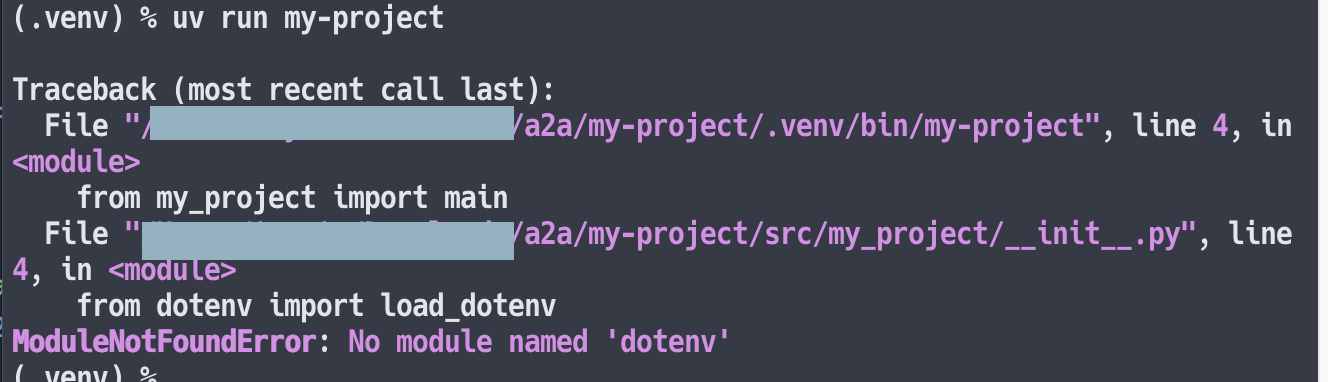
※ 冒頭で使われてなさそうな dotenv がインポートされていて、それがエラーの原因にもなったので、コメントアウトしています
import logging

import click
# from dotenv import load_dotenv
import common
from common.types import AgentSkill, AgentCapabilities, AgentCard

logging.basicConfig(level=logging.INFO)
logger = logging.getLogger(__name__)

@click.command()
@click.option("--host", default="localhost")
@click.option("--port", default=10002)
def main(host, port):
  skill = AgentSkill(
    id="my-project-echo-skill",
    name="Echo Tool",
    description="Echos the input given",
    tags=["echo", "repeater"],
    examples=["I will see this echoed back to me"],
    inputModes=["text"],
    outputModes=["text"],
  )

  capabilities = AgentCapabilities()
  agent_card = AgentCard(
    name="Echo Agent",
    description="This agent echos the input given",
    url=f"http://{host}:{port}/",
    version="0.1.0",
    defaultInputModes=["text"],
    defaultOutputModes=["text"],
    capabilities=capabilities,
    skills=[skill]
  )

  logging.info(agent_card)

if __name__ == "__main__":
  main()
手順の中で、2箇所に分かれて書かれていたものを両方対応した後のものです。ここで、どんな入出力に対応できるか(上記だとテキストのみ)や、エージェントにアクセスするための URL・ポート、エージェントが対応できる内容について記載されているようです。
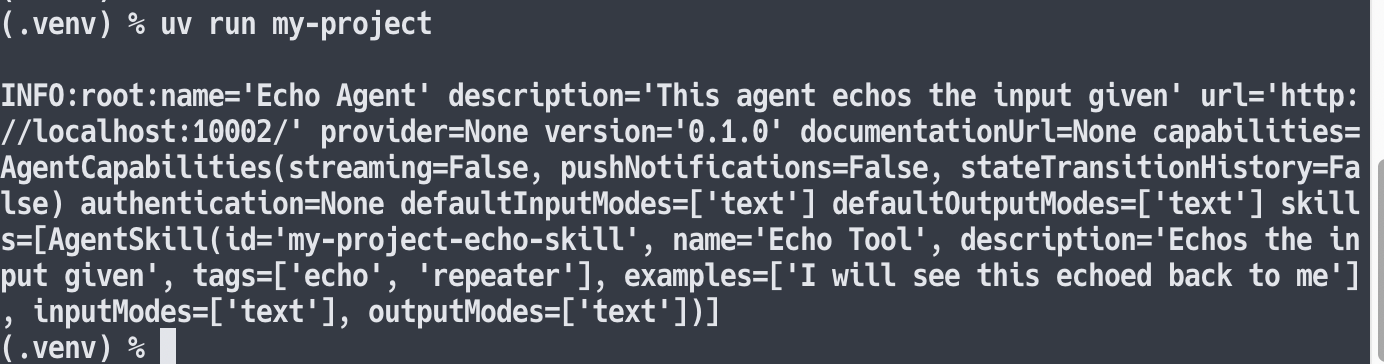
そして、以下を実行します。
そうすると以下のとおり、先ほど追加実装した内容が想定通りに出力されていました。
ちなみに当初、コード冒頭のコメントアウトをしていなかった時は、以下の dotenv関連のエラーが出ていました。
サーバーの起動
今回の記事で進める最後のステップです。以下に書かれた内容を進め、サーバーを起動します。
●Start server – Agent2Agent Protocol (A2A)
https://google.github.io/A2A/tutorials/python/6-start-server/
task_manager.py の実装
上で書いていた手順で、空のファイルとして作成していた以下のうち、task_manager.py のほうの実装を行います。
- src/my-project/task_manager.py
- src/my-project/agent.py
実装する内容は、以下のとおりです。
src/my-project/task_manager.py
from typing import AsyncIterable

# import google_a2a
# from google_a2a.common.server.task_manager import InMemoryTaskManager
# from google_a2a.common.types import (
import common
from common.server.task_manager import InMemoryTaskManager
from common.types import (
  Artifact,
  JSONRPCResponse,
  Message,
  SendTaskRequest,
  SendTaskResponse,
  SendTaskStreamingRequest,
  SendTaskStreamingResponse,
  Task,
  TaskState,
  TaskStatus,
  TaskStatusUpdateEvent,
)

class MyAgentTaskManager(InMemoryTaskManager):
  def __init__(self):
    super().__init__()

  async def on_send_task(self, request: SendTaskRequest) -> SendTaskResponse:
    # Upsert a task stored by InMemoryTaskManager
    await self.upsert_task(request.params)

    task_id = request.params.id
    # Our custom logic that simply marks the task as complete
    # and returns the echo text
    received_text = request.params.message.parts[0].text
    task = await self._update_task(
      task_id=task_id,
      task_state=TaskState.COMPLETED,
      response_text=f"on_send_task received: {received_text}"
    )

    # Send the response
    return SendTaskResponse(id=request.id, result=task)

  async def on_send_task_subscribe(
    self,
    request: SendTaskStreamingRequest
  ) -> AsyncIterable[SendTaskStreamingResponse] | JSONRPCResponse:
    pass

  async def _update_task(
    self,
    task_id: str,
    task_state: TaskState,
    response_text: str,
  ) -> Task:
    task = self.tasks[task_id]
    agent_response_parts = [
      {
        "type": "text",
        "text": response_text,
      }
    ]
    task.status = TaskStatus(
      state=task_state,
      message=Message(
        role="agent",
        parts=agent_response_parts,
      )
    )
    task.artifacts = [
      Artifact(
        parts=agent_response_parts,
      )
    ]
    return task
init.py の修正
ここで src/my-project/__init__.py に、サーバー関連の処理を少し追加します。
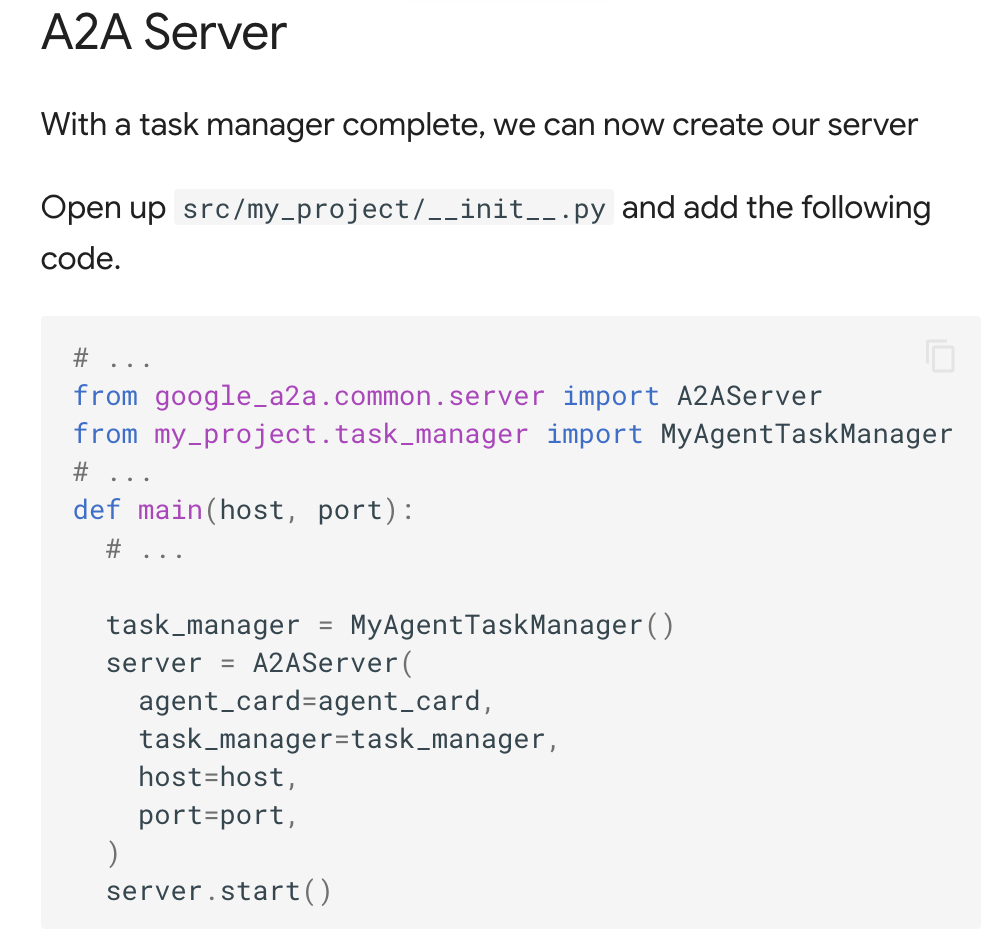
追加を行った後のコードは以下のとおりです。
import logging

import click
# from dotenv import load_dotenv
import common
from common.types import AgentSkill, AgentCapabilities, AgentCard
# from google_a2a.common.server import A2AServer
from common.server import A2AServer
from my_project.task_manager import MyAgentTaskManager

logging.basicConfig(level=logging.INFO)
logger = logging.getLogger(__name__)

@click.command()
@click.option("--host", default="localhost")
@click.option("--port", default=10002)
def main(host, port):
  skill = AgentSkill(
    id="my-project-echo-skill",
    name="Echo Tool",
    description="Echos the input given",
    tags=["echo", "repeater"],
    examples=["I will see this echoed back to me"],
    inputModes=["text"],
    outputModes=["text"],
  )

  capabilities = AgentCapabilities()
  agent_card = AgentCard(
    name="Echo Agent",
    description="This agent echos the input given",
    url=f"http://{host}:{port}/",
    version="0.1.0",
    defaultInputModes=["text"],
    defaultOutputModes=["text"],
    capabilities=capabilities,
    skills=[skill]
  )

#   logging.info(agent_card)

  task_manager = MyAgentTaskManager()
  server = A2AServer(
    agent_card=agent_card,
    task_manager=task_manager,
    host=host,
    port=port,
  )
  server.start()

if __name__ == "__main__":
  main()
ここまでの内容ができたら、以下を実行します。
そうすると、公式手順に書かれているのと同じ結果を得ることができました。
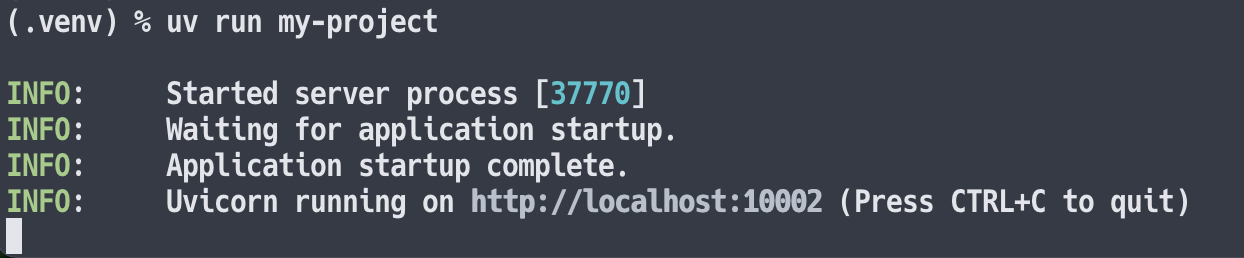
ひとまず、公式手順に従ってサーバーを立ち上げるところまでは進められました。Interact with server 以降の残りの手順も、別途進めていければと思います。

Views: 2
